Tuesday, 28 June 2016

12 tags of Tim Holtz - June 2016

Hello and Welcome
Sorry for my recent lack of blog posts but thank you for hanging in there and being here with me today as I share  my version of Tim Holtz 12 tags of 2016- June.
I have followed Tim's excellent tutorial (both tag and tutorial can be found here) but I have given my tag a real American 'Stars and stripes' theme. Well with the 4th of July - Independence day less than a week away I thought why not?
and here it is
I used the stars stamp from Tim's 'Rockstar' stamp set to add detail to the plain tissue wrap for the background. To the right I stamped rows of 'u' 's' and 'a' using the long alphabet stamp from Tim's 'documented' stamp set
I chose to use a stamp rather than a stencil for the stripes inking the stamp with Distress ink, spritzing with water and then stamping onto Woodgrain paper stock -love the way the Woodgrain creates great textured lines.
I was able to add some stitching having set up my sewing machine recently - that was fun even if I am a little unpractised. I adhered a memo pin behind a number token to embellish one side of the tag . The number is highlighted with white distress crayon
Tim's occasions small talk stickers provide the sentiment  and notice Uncle Sam's black gem buttons and silver and red rose buttonhole! 
not forgetting the hanging star studded heart!
and once again my Stars and stripes tag in all its glory! God bless America. 
As always I really enjoyed creating this months tag, probably more so as my dear American friends and family were close in thought throughout.
Thanks Tim for all you do to nurture my inner creativity and for endlessly inspiring! 
Time now for me to go link this up to 
so for now I will love you and leave you and hope to see you all again soon . 
Thanks for all your visits, follows and comments - they are always appreciated . 
Take care 
Amanda 
xxx

Friday, 3 June 2016

Embossing Pastes/ Texture - A Vintage Journey - June 2016 Challenge

Hello Everyone and Welcome
Hope you are all doing good and have enjoyed a great week. 
As the month of June begins so does a new challenge over at A Vintage Journey. Lovely Astrid is the host this month and her chosen challenge is 'Embossing Pastes/ Texture
This is what she says :
'Use any kind of texture paste, homemade, crackle, coloured or plain on your project . There is an endless variety available so play, have fun and apply it to your hearts content. Use it through stencils, randomly or in whatever way you want but remember it should be in one of the vintage, shabby, mixed media, art journaling industrial or steampunk styles that we favour. Put on your mixed media hat and create some magic.'

What a fabulous Challenge don't you think?

As  its been just over a year since I began my blogging journey  I thought that for Astrid's challenge I would look back to my very first post and recreate the wooden hanging heart I made then using a different colour palette but retaining all the crackle and texture . It would make for a lovely birthday gift for an up and coming birthday too .
My first altered heart can be seen here where there are details of how I altered it so I will keep the 'how to' brief this time and focus more on the products I have used 
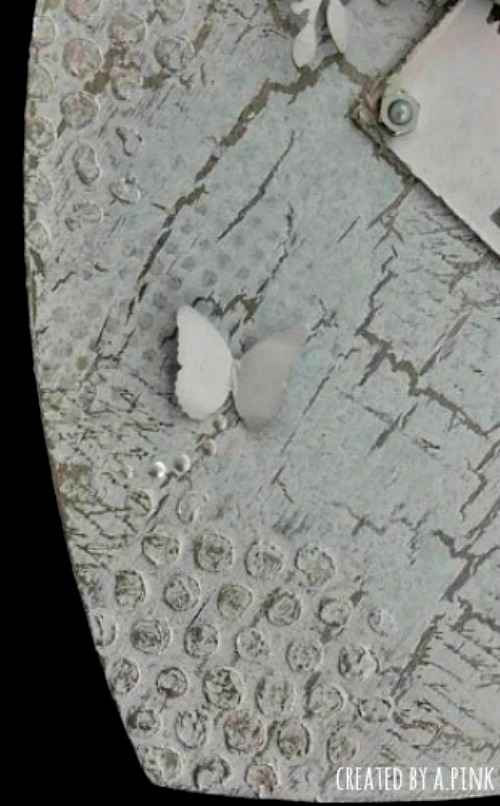
I began by priming the mdf heart with a coat of gesso and then decided on my colour palette. I strayed away from all the craft branded paints we all know and love and used instead a Laura Ashley emulsion paint,Pale Duck Egg Blue as the main colour accented with Daler Rowney Silver acrylic paint and Tim Holtz Hickory Smoke distress and archival inks. 
The crackle medium that's created those lovely cracks is Paper Artsy Crackle glaze. I also used Paper Artsy Grunge paste to create the texture, applying it through Tim Holtz bubble layering stencil. I love working with Grunge paste as it seems to be that bit thicker than other pastes I have used which I find helps reduce the risk of any seepage under the stencil when applied. I also love the rougher, grungier look it gives especially when enhanced with inks or gilding wax, in this case both.

Extra detail is created with a fine hand script stamp in Archival ink and some distress ink stencilling using Tim Holtz dot fade layering stencil. Notice the butterflies too with their liquid pearl trails. They are punched from card stock (painted the same colour as the heart) using a Martha Stewart punch. 
 The flowers, that give dimension to the heart, are die cut from more of the painted card stock using Spellbinders 'Bitty Blossoms'. I used Tim Holtz laurel punch to create the leaves. I embellished the flowers with beads and added a few twists of silver wire. 
The quote , so meaningful and true, is from Wendy Vecchi stamp set 'Love to Make Art' and is stamped in Hickory smoke Archival distress ink.   Looks like the gem topped hex nuts have made an appearance again too- oops, you're probably tired of seeing them by now but I just think they add an extra touch of interest and make a lovely finishing touch. 
 And once again here is my finished hanging heart that is actually a touch bluer (but only a touch) than the lens would actually have you believe.
  I hope I have offered some inspiration for Astrid's 'Embossing pastes/ texture challenge' and whether I have or have not be sure to pop by A Vintage Journey to see lots of inspirational projects created by my fellow Creative Guides.
We would love for you to join in the challenge so as Astrid says 'put your mixed media hats on and go create some magic'. We look forward to seeing your entries . 

I would like to enter this into the following challenges 
Simon Says Stamp Monday Challenge - Monochrome 
Mixed Media Monthly #25- 2nd Anniversary 
(#18 Texture, #23 Dimension and #19 Silver and Gold) 
The Craft Stamper TIMI Challenge : June 'Lets get Inky'    
Stamps and Stencils - Challenge-  Floral Frenzy
Frilly and Funky - Challenge: Let the Words do the Talking  
Country View Crafts Challenge: Crackle
 
Thanks for taking the time to pop by today. Its always a pleasure to have you visit. 
I look forward to seeing you all again soon 
Have a lovely weekend 
Take care 
Amanda 
xxx
 

Saturday, 28 May 2016

12 Tags of Tim Holtz - May 2016

HI Everyone and Welcome 
Hope you are all enjoying the weekend so far and the sun is shining down on you all.  I'm set to head back to my 'happy 'place ( Craft HQ) today but before I do I would like to share with you my take on Tim Holtz 12 tags of 2016- May.
You can see Tim's tag for May here and as you will see I have mixed things up a little- not with the techniques they remain the same, primarily with the stamps. I don't yet have the Lady Rose stamp set so I have had to use an alternative and that has then influenced the colours, stencils and dies I have used.
So the stamp set I have used is 'Roadtrip'. It was a real 'must have' set when I first saw it as I have always dreamed of one day traveling down Route 66 in the U.S.A on a Harley Davidson! Alas, it is still just that - a dream but at least now I have this tag to keep the dream alive.
and a a few close up .... 
the tissue tape resist technique which not only is a great technique but also provides the 'white' for my red, white and blue American colour scheme. (Fired Brick, Salty Ocean distress spray stains). I also added a sticker and some remnant rubs befitting of my tags theme.
I used Tim's  'Traveller' layering stencil, and Tim's new gearhead thinlit dies. I cut the gears out twice and adhered them together to create thicker gears that would give some dimension when adhered to the tag. 
Another gear with brad, ideology arrow, Pewter distress spray stain and silver gilding wax provide the metallic touches 
and of course the Route 66 road sign.
Here it is again - my take on Tim's tag for May 2016
 Thanks again Tim for yet another great tag full of creative inspiration. Life just wouldn't be the same without a monthly Tim tag to make .
As you've probably guessed I will be entering this into 
Tim Holtz 12 tags of 2016- May 
and I would also like to enter this into the following challenge
 Frilly and Funky Challenge - Oh The Places You'll Go!  
 Time now to head back  to my 'happy place' and see where my creative muse takes me . 
Thank you so much for taking time out this holiday weekend to stop by. I do appreciate it, as I do your comments and follows. 
Hope you all have a lovely weekend
Take care 
Amanda
 xxx

Thursday, 26 May 2016

'Think Pink'- Guest Designer at Stamps and Stencils

Hello Everyone and Welcome
Hope you are all doing ok and having a great week so far. 

Today I am a Guest designer over at Stamps and Stencils having been fortunate enough to be their Challenge winner in April for my 'Spring is in the Air' altered canvas (if you missed it it can be seen here) and I really am thrilled and honoured to have been given such a wonderful opportunity to share some of my creativity on such a fabulous blog that has a very talented design team. 
With most of the details about my project over on Stamps and Stencils blog  I'll just take you on a quick tour around my project including a little story about a photo I have used.
When I learned that Stamps and Stencils challenge theme this month, hosted by Branka, was 
'Think Pink'
I couldn't help but smile! If I'm honest I laughed out loud! It had my name written all over it- literally!!
Hahaha! 
So there really was only one way I could go with this challenge I thought- and that was to make something that had a little bit of 'me' in it, on it or about it!
Here's what I made - a 5x7 inch altered canvas using tones of pink and an old school photo of a little girl (me) called Pink! 
Looks like butter wouldn't melt doesn't it with those eyes and that smile ....mwahhhh!  

 
So lets start with the canvas

 I do love the Tim Holtz dot fade stencil (it has been said that I can drive people dotty). There's also some lightly stenciled numbers. (Maths was my favourite subject at school, oh along with art of course) and some 'Hot Pink' paint splats (I love the carefree creativity of splats) 
I also added some crazing
cracks and nuts (me,crazy? cracked? nuts? hahaha I'll let you decide)

The photo is an old school photo, taken when I was about 8/9 that I resized and developed in black and white. I think of all my school photos its my favourite. However I'm sure my mum would beg to differ as she was,lets say a little disappointed that my hair wasn't in the the very neat and tidy 'a bit up and a bit down' style I left home with that morning! Well believe it or not the parting that looks like the 'hinds legs of a donkey' wasn't my fault even though that cheeky grin may suggest otherwise. It was indeed the fault of a boy in my class who en route to  pose for the camera decided it would be so funny if he ruffled up some of the girls hair and yes I was his main target!
Thanks Peter for making a memory that never fails to make me smile ! 
To finish off my 'Pink' canvas I added a personal wish and 'note to self .....'
and now for the arty shot
I thoroughly enjoyed creating this canvas and am really pleased with how it turned out. I really hope you like it too.
Huge thanks to all the team at Stamps and Stencils for the Guest design spot today - it has been a real priviledge and honour .
I would like to enter this  canvas into the following challenges
Simon Says Stamp Monday Challenge- Make a Wish!
Country View Crafts- May Challenge and Blog Hop - Use a Stencil
Anything but Cute Challenge #13 Celebrate your style 
 Creative Carte Blanche- Wood .... a word.... and something wild!
( wood= photo frame, words = small talk sticker , Wild= my hair!!)  

 Thank you so much for stopping by today. Your visits, comments and follows are always welcomed and appreciated 
Hope you all have a lovely weekend and the sun shines down on you all 
Take care 
Amanda 
xxx