A Vintage Christmas
Hi there Everyone
Hi there Everyone
Today is not only the start of a new challenge over at A Vintage Journey but it is my first official post as an AVJ Creative Guide. How exciting !
Lovely Annie is hosting this months challenge and her chosen theme is 'A Vintage Christmas' and here's what Annie has to say
'Use your dies, stamps, rub-ons, anything you choose to create a Vintage Christmas card , home decor piece or a gift for someone special ! '
What a wonderful theme for December with the festive season upon us!
Over the years I have bought some lovely original Christmas decorations. Here's a couple of them


So lets gets the Creativity started ......
The Background Panel
I created the background using Tim's 'Rusted Enamel' technique, Fired Brick and Ground Espresso Distress Inks being my colours of choice . The technique can be found in Compendium of Curiosities Vol One, Page 41. Though it is quite a tricky technique to master its definitely worth trying.
I also added some script stamping around the edges of the background panel before adhering onto a cream card stock mount.

The Frame
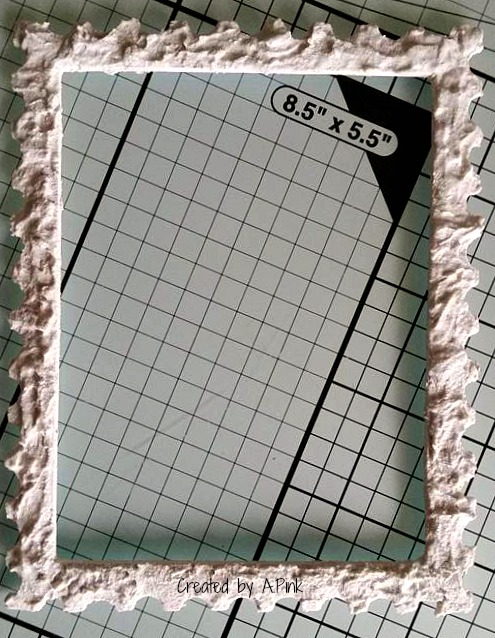
I die cut a piece of mount board using Tim Holtz Postage stamp Bigz die and cut away the centre to create a frame.

I applied a coat of Gesso to the frame and once dry a generous layer of Deco Art Sand Texture Paste.
Once the paste had dried using a dry stippling brush I painted the frame with Distress paints (Ground Espresso and Tarnished Brass.) Using my finger I caught the rugged surface of the frame with Gilding Wax .


Santa
Santa, taken from Tim Holtz 'Retro Holidays' stamp set is stamped on cream card stock using Potting Soil Archival ink and coloured using Caran~Dache Watercolour Pencils. I inked around Santa using Distress Inks (Walnut stain and Ground Espresso) but felt it still needed something more so I masked Santa and then Spritzed and Flicked . I love this technique it's such a simple technique but so effective- just the added extra my Santa image needed !

The Corrugated Panel
I cut a piece of corrugated card (from an old box) to the required size and artistically tore (cough!) some of the top layer away to create a ragged look. Using my finger I randomly applied Tarnished Brass Distress Paint to the panel and Gold Gilding Wax before distressing the edges with Distress Inks (Walnut Stain and Ground Espresso).


I'm pleased with how my piece of home decor turned out and i am looking forward to displaying it alongside my much loved Christmas Ornaments this year. I think it will compliment them perfectly.

I then mounted this panel onto a piece of cream card stock before finally adhering to a piece of mount board.
Frame Decoration
The holly and leaves are die cut using Tim Holtz Festive Greenery Strip die and coloured using Distress ink (Forest Moss,Ground Espresso and Walnut Stain) . I applied a crackle glaze to the holly and once dry I rubbed Ground Espresso Distress Ink over the cracks to accentuate them more. 
All that remained now was to bring everything together .
My finishing touches are a length of natural jute ribbon around the background panel, a brass button topped with a deep red gem bead to embellish the holly arrangement, some Tim Holtz ideology , and a chit chat sticker 'Believe'! 
Well after all, I believe in Santa Claus don't you?


I hope you have enjoyed your time with me today, it was rather a long post I know, but I thought you would like to see and read the various stages of creating .
If this months challenge theme 'A Vintage Christmas' appeals to you then there's plenty of time to enter Head over to A Vintage Journey, where you can view more wonderfully inspiring projects by my fellow Creative Guides.
We would love for you to join us so be sure to checkout the rules and then go get those fingers inky. It maybe just the break you need from all the Christmas prep .
We would love for you to join us so be sure to checkout the rules and then go get those fingers inky. It maybe just the break you need from all the Christmas prep .
Thank you so much for popping by today! Your visits, comments and follows are always very much welcomed and appreciated.

I would like to enter my home decor panel into the following challenges:
(I used Gold and Silver gilding wax )

( Santa is a true gentleman and my Home decor panel is a suitable gift for a male )
Now its time for me to go write my letter to Santa!
Look forward to seeing you again soon but until then I wish you all
a lovely weekend
Take Care
Amanda x
A fabulous home decor piece and great step by step Amanda x I love those amazing Christmas ornaments too......very quirky !!
ReplyDeleteGreat to have you here at AVJ
Huge hugs Annie x
Welcome, welcome Amanda to the Creative Guides with this, your first project! What a wonderful framing of Jolly old St. Nick - so much texture and shimmer with your beautiful frame and bright background - you used so many beautiful techniques on this! Julia xx
ReplyDeleteWhat a beautiful vintage panel Amanda full of lovely texture and aged to perfection. I love the layers you have built up and those gorgeous cracked holly leaves are utterly delightful. The picture of Santa is lovely as he looks out as us and yes I believe too.
ReplyDeleteHave a great weekend.
hugs Brenda xxx
This is such a perfect piece to sit alongside those gorgeous vintage decorations and I can see in your piece how you were inspired by them. The frame is absolutely stunning and really sets off that Santa image perfectly. Great embellishments too, love how you did the holly. A great step by step too, it is always lovely to see how a piece comes together. It is wonderful having you on the team! Hugs, Anne xx
ReplyDeleteAmanda your Christmas vintage box frame is just fabulous ! I love how you created the frame with the sand paste, it looks so beautifully textured and coloured. And all the other wonderful crackling surrounding the gorgeous Santa. I just love it and no wonder you are proud of it. Fabulous work. Jennie x
ReplyDeleteYummy - as always will look fab with the ornaments xxx
ReplyDeleteReally stunning, Amanda. The rusted enamel panel looks amazing - completely metallic, and I love the brilliant spritz and flick framing of jolly Father Christmas. Great distressed finish on the frame too... another triumph of texture and layering. I'm not much of a one for red usually, but this is one of my favourite crafty Christmas cards ever!
ReplyDeleteAlison xx
Absolutely stunning, Amanda. Your tutorial was beautifully written and the photos amazing. I know the time it took for you to create this post....well worth every minute of it! Beautiful Christmas piece with a lovely vintage feeling.
ReplyDeleteAmanda, I really loved reading how you created this, thanks so much for sharing your details. So fun to learn from one finger painter to another. :) Every detail of this works so perfectly with the next. I just love the crackled holly and am "dieing" to get that die. Tee hee... Thanks for the ideas, will just have to hand cut me some and get to crackin'!
ReplyDeleteWhat a fantastic project Amanda, stunning the way you have employed the different techniques and created such amazing textures! The end result looks super, that Santa stamp is just perfect, love this to pieces!
ReplyDeleteHi Amanda, love your first piece . The backdrop looks so textile, it's gorgeous. Love the corrugated card too and your layered design, perfect for he vintage Santa . Love,your decorations, they are gorgeous. Tracy x
ReplyDeleteAmanda, what a fabulous project for your debut as a Creative Guide at AVJ, I love it! The rusted enamel panel is gorgeous and love the texture you created on the postage stamp frame. Santa's image just pops off your spritz and flick background, perfect! Love all of the embellishments you added (the crackle on the holly leaves is lovely!) and your artistically torn corrugated card adds another wonderful layer of texture, well done ;O) Just a fabulous home decor piece to compliment your wonderful Christmas ornaments, thanks so much for sharing it with us! Deb xo
ReplyDeleteWelcome aboard Amanda - I believe!! Love your first official project and looking forward to many more. Nicely done. S@ndy xx
ReplyDeletebeautiful work Amanda - i love this to bits! Hugs rachel x
ReplyDeleteSo gorgeous Amanda and I think a helicopter for Santa is a wonderful idea!!
ReplyDeleteHave a lovely weekend. Big hugs from Poppy and me xxx
Love the step-by-step tute so that we can all have this gorgeous piece of home decor, Amanda! Also love those first two (definitely out of the box) creations! Well done, and congrats on your AVJ debut! Mwah!
ReplyDeleteWow Amanda, I really love this card! So many wonderful techniques to create interest and texture! Love the frame and your fabulous Santa image! Those are awesome decorations, they sure are unique! hugs :)
ReplyDeleteGreat vintage decoration and traditional colours which look so cheerful I adore the stamped image you have used which is a favourite of mine he always seems to make his way into my Christmas makes lol.
ReplyDeleteMaggieH
Your card is so beautiful. Love all the fabulous details. Thank you so much for sharing with us at Simon Says Stamp Monday Challenge. :)
ReplyDeleteHe is such a happy Santa - this is certain to bring good cheer and warmth. A brilliant make Amanada! Nicola x
ReplyDeleteOh I do love your framed Santa and he looks even more amazing on the corrugated cardboard!! What a great vintage project, Amanda!
ReplyDeleteSo where do I start!!! The use of so many wonderful techniques, the clever layering and design, the attention to detail - frankly it all just works perfectly. That's vintage Christmas right there - LOVE IT! Jenny x
ReplyDeleteThis is super!! I love the textures in your card and the colours are perfectly vintage too! Thanks for joining us at Frilly and Funkie xx
ReplyDeletePopping back Amanda to say that I hope you have your feet up and are taking it easy and staying well. Sending you my very best wishes for a most Happy Christmas and all that you wish for in 2016. Nicola x
ReplyDeleteJust popped over to wish you and yours a peaceful and joyous festive season!
ReplyDeleteAlison xx
LOVE your creation for our challenge at Craft Stamper.
ReplyDeleteThanks for joining in the fun.
xxx Ellie xxx
gorgeous santa frame! the details are stunning. love the sand paste around the edge, and what a great idea to 'seal' it with the wax. and your original santa decorations are so so cool! Thank you so much for playing with the Mixed Media Monthly Challenge! Happy New Year!
ReplyDelete-Rachel
rwkrafts.com
What a beautiful festive decoration .... Thank you for playing along with the Craft Stamper Challenge. Linda xx
ReplyDelete