Showing posts with label Tim Holtz layering stencils. Show all posts

Thursday, 3 March 2022

Forever Friends!

 Hi Everyone and Welcome, 

As usual as its  Thursday you can find me over on That's Crafty's blog sharing some creativity. 

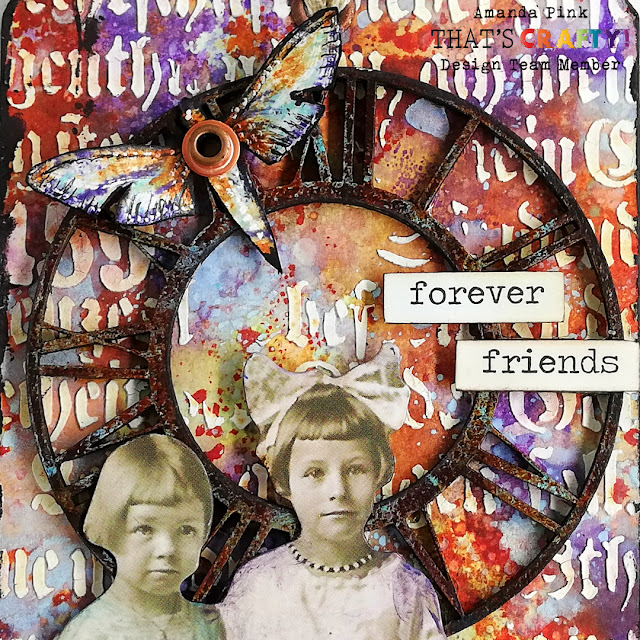
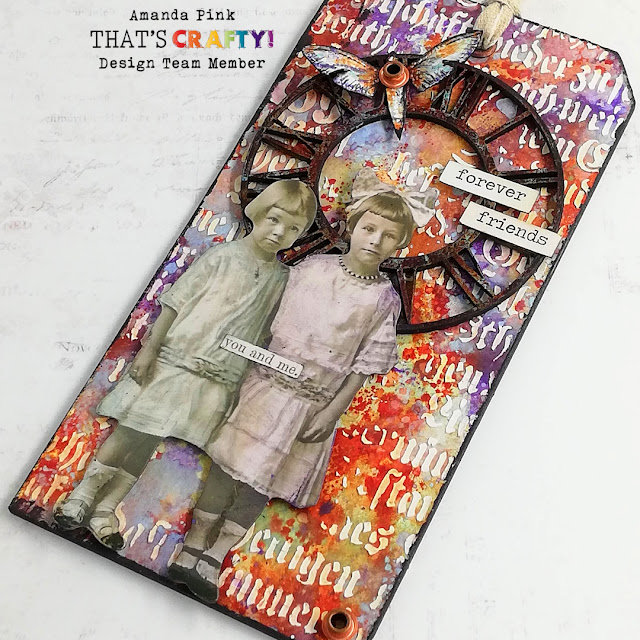
For today's post I have created a mixed media tag that's about friendship, a forever friendship between two young girls, Betsy and Lucy. 

Plenty of Tim Holtz products were used in the making from inks, to stamps to stencils to ideology along with a That's Crafty! White greyboard tag and one of their small clock embellishments 


 Betsy and Lucy would like to say Hi. 


Like alot of us they enjoy getting messy with paints and crayons and having lots of fun (and mischief)
together. 
 
They would love for you to come join us over on the blog so you can see and hear about the creative fun we've all been having. 
Just click HERE and you'll be with us in no time at all . 
Hope to see you soon
Amanda

I'd like to enter this into the following challenge: 

Thursday, 2 December 2021

'Winter'

Hi Everyone and Happy December! 

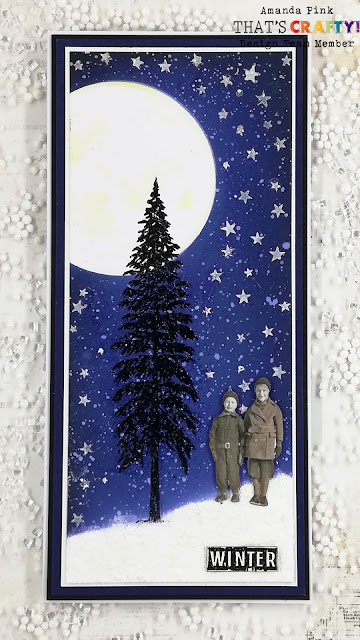
So,the Christmas countdown has officially begun and although slow getting started my christmas card creativity is in full swing now.  So today I'm over on That's Crafty's blog sharing one of the latest cards I've created.  

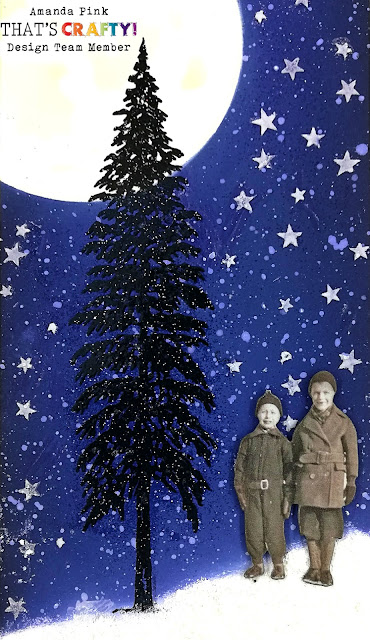
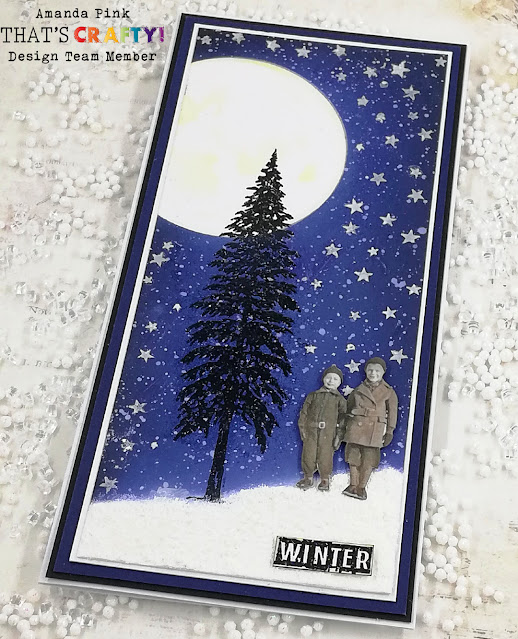
It features stamps from katzelkraft's 'Winter Wonderland' stampset and Tim Holtz products. 


I love this long slim tree especially against the moonlit starry sky ....


...... and so pleased the cute young boys all wrapped up warm hung around for their photo taking after they'd been playing in the snow. 


As always there's more to see and read on That's Crafty's blog so why not come join the boys and I   over there.  
Just click HERE and you'll be with us in no time . 
Hope to see you soon 
Amanda 
x

I'd like to enter this into the following challenge: 

Thursday, 14 May 2020

If they Were to Fly Away ....

Hi There 
Hope you are keeping well and staying safe 

Its that's time of the week again when I can be found over on That's Crafty 's blog sharing my latest DT project which today is a distressed mixed media tag featuring a grungy coloured butterfly . 

Heres a sneaky peek....


If you fancy joining me over on the blog to see and read more just click HERE to be swiftly and safely redirected . 
Hope to see you soon 
Amanda
x

Friday, 30 June 2017

Tag Friday at A Vintage Journey - June 2017.

Hi Everyone and Welcome

Today over at A Vintage Journey its Tag Friday ! I'm sure many of you are familiar with this tradition but for those of you aren't let me explain . When there are 5 Fridays in a month, the 5th Friday sees some of the Creative Guides create and post a tag .There are no rules or themes just a chance for us to follow our muse, go with the flow and create using a tag.
So I am here today to share with you my 'Tag Friday' tag.
Believe it or not I set out thinking I would make something bright and summery but I guess my subconscious mind thought otherwise and led me to to create a deep and meaningful tag.

I cut a panel from a much larger wrinkle free background that I had created at some point in the past and added a touch more colour using Distress inks with a blending tool.
I then die cut a tag from the panel and added some stamping using Indigo Blu's 'Rain Droplets' stamp with Jet Black archival ink and some stencilling using Tim Holtz 'Rays' layering stencil with DecoArt crackle paste and Black Soot distress paint. The cracks once formed were enhanced with gilding wax and the tag mounted onto cream and black card stock.

The focal image taken from an Invoke stamp set- 'Face blocks' was stamped on cream card stock using Jet black Archival ink and then water coloured with Distress inks.
To frame the face I used the outer part of the circle from Seth Apters Wood Chip set. I altered it using Deco Art texture sand paste and Back Soot distress paint. The framed face is adhered to a thin strip of mount board altered in the same way as the circle Wood Chip. As with the cracks the texture is enhanced with gilding wax.

I love this image - to me it is so emotive, it tells a story

maybe  a story of someones own
personal journey experiencing some bright 'sunny highs' and extreme dark 'rainy lows',
experiences which have helped them start to belief in themselves....
........Maybe........

Be sure to stop by A Vintage Journey's blog, if you haven't already that is, to see all the other fabulous tags some of my talented teammates have created .

I would like to enter this tag into the following challenges: 
Stamps and Stencils: 'Words With Meaning'
Simon Says Stamp Monday Challenge: 'Stencil it' 

Thank you so much for stopping by today and for all the lovely kind words you leave for my art. Your visits, comment and follows are greatly appreciated .
Hope you all have a lovely weekend
Take care
 and
keep on the 'happy' side
Amanda 
xxx

Friday, 7 April 2017

The Magic of Three- A Vintage Journey April 2017 Challenge

Hi Everyone and Welcome

Hope you have all had a great start to this month- April already and time to kick start our New Challenge Over at A Vintage Journey . This month Annie is our host and her challenge is
'The Magic of 3'
Here's what Annie says: 'It is said that using 3 of something adds interest and power whether its a conversation , art or numbers . Let us see how you use three of something in your challenge project- numbers, techniques, stamps, colours, words, products the list is endless. Let us know your magic three components and ensure your project is in our vintage, shabby, mixed media. art journalling, industrial , timeworn or steampunk styles we favour '.

For my 'Magic of 3' project I have made an art panel working with a few variables of 3. If you're ready to find out what they are lets make a start
To create the art panel itself, excluding all the elements and embellishments I used 3 substrates: Mountboard - that's the main panel and cardstock and canvas- they're the smaller central panel.
I have also worked with three colours - Black Soot, Picket Fence and Twisted Citron distress paints/distress crayons.
The central panel is cardstock covered with canvas with Ranger texture paste applied through Tim Holtz 'Stripes' layering stencil down the centre and in both the top left and bottom right corners.
I used Black Soot distress crayon to colour the canvas applying it lightly to the canvas and blending with a dampened finger to create lighter tones. The stencil lines are emphasised using Black Soot distress paint.
I love how the crayons pick up the grain of canvas- instant detail! Have you noticed how many stencil lines are in each of the corners .....
Some subtle stamping using Jet Black Archival ink and some splatters (of course) using Picket Fence and Twisted Citron distress paint added a touch more detail.
This panel was then adhered to a panel of Mountboard with a tissue tape border.
how fortunate 3 forms part f the numbers on the tissue tape .
Now for the focal feature.
Again I have used three substrates - metal wire, cardstock, wood. The wooden heart is stencilled using texture paste through Tim Holtz dot fade stencil and painted with Black Soot distress paint. The dots are highlighted with a paint mix of black and white paint.
The butterfly is one of the beauties from Tim Holtz new release stamp set 'Flutter' simply stamped on cardstock and painted using Twisted Citron distress paint.
All the embellishments come in threes too - the butterfly is embellished with an ideology game spinner attached with a brad topped with a gem dot

and 3 hex nuts topped with 3 gem dots embellish the top and bottom edges of the canvas.
So that's at least 6 variables of 3 used in creating my 'Magic of 3' art panel.
and I have to say I am pleased with it - hope you like it too.
I hope my art panel along with all the fabulous projects created by my fellow Creative Guides, which can be seen here at A Vintage Journey ,will inspire you to go create yourself and join in our 'Magic of 3' challenge
At the end of this challenge there will be one lucky winner chosen by Random Org who will receive our Sponsors prize which this month is a $50 gift card kindly donated by Emerald Creek Craft Supplies.
The Creative Guides will also choose 3 Pinworthy winners who will not only win a Pinworthy badge to display on their blog but will also be invited to join us as a Guest Designer for a future challenge . We look forward to seeing your creativity and appreciate all your entries and participation.

I would like to enter this into the following challenges 
The Craft Stamper TIMI Challenge: April - 'Take a Stamp'. 
Creative Artiste Challenge Blog- Challenge #25 
Altered Eclectics: Anything Goes as long as its altered/ MIxed Media, NO Cards / ATC's 
 
Thank you for stopping by today. 
As always your visits, comments and follows are welcomed, truly valued and mean alot.
Wishing you all a wonderful weekend
Take care and until I see you again
keep on the happy side
Amanda
xxx

Friday, 2 December 2016

Winter Magic- A Vintage Journey, December 2016 Challenge

HI Everyone and Welcome
Hope you've all doing good and have had a great week. With Winter now upon us I hope you will be able to join us in our new Challenge over at A Vintage Journey which is just perfect for the season. Debs is our host this time and she has chosen
Winter Magic
'For us in the Northern Hemisphere December brings the start of Winter is so much more than that and so we ask , how would you interpret the magic of Winter? Snow, Icicles, colours of blue, silver and white, the festivities of Christmas, misty winter landscapes: show us what your magical focus is for this season .As always we ask that you follow our travelling instructions and that your project be created in a vintage, shabby, mixed media, art journaling,industrial or steampunk style .'
As always there will be one lucky winner who will receive our sponsors prize which this month is a £20 voucher to spend at Country View Crafts.
The Creative Guides will also choose 3 pinworthy winners who will not only win a pinworthy badge to display on their blog but will also be invited to join us as a Guest Designer for a future Challenge.

Snow always comes to mind when I think of 'Winter Magic' so I have a canvas to share with a snowy feel created with an arty, wintry spirit.
Having come across a 5x7 canvas I started painting earlier this year I decided to build on the grey wash I'd already laid down way back when by adding tones of blue, grey and white using Tim holtz distress paints ( broken china, tumbled glass, hickory smoke, picket fence) and gesso for the white. All applied very freestyle and with the finger , just going with the flow
continuing the process until it looked ok. I love how the paint and especially the gesso pick up the texture of the canvas.
Unfortunately that's the only process photo I have so I hope you will now enjoy a descriptive tour around the canvas
Detail was created using stamps (Tim Holtz snowflakes, Birch , Half tone, a script stamp) with Archival ink(cornflower, watering can,cobalt) and Tm Holtz layering stencils (Snowflakes,Dot fade) with Tim Holtz Grit paste and gesso .
The snow is a mix of both DecoArt Snowtex and Tim Holtz Grit paste . It was given a touch of sparkle using Tim Holtz distress glitter (rock candy) and in some lights it really does gently glisten. A spritz of perfect pearls also added a touch of shimmer.
With the crackle sneaking in on the photos so far its time for the focal feature . This was created using Seth Apters Drip drop die - multiple die cuts adhered together , painted in silver and crackled using DecoArt crackle paste,the cracks being highlighted with gilding wax .
This was adhered to a painted and lightly sparkled mdf pocket watch which provides an ideal base for the snow dusted Tim Holtz dimensional Silver star.
And a few snowed up embellishments helped finish off my arty spirited canvas
with a snowy feel

I hope I have offered some inspiration and that you will be able to join us in our 'Winter Magic' . If you haven't already be sure to pop by A Vintage Journey to view some of my fellow Creative Guides projects. There are some fabulous creations to be seen and lots of inspiration to be had. 
I really did enjoy being back in my 'happy' place doing what I love, for a design team that I feel so lucky and proud to be apart of.

I would like to enter this into the following challenges : 
The Craft Stamper TIMI December Challenge: Take a Theme: Snow and Ice  
Frilly and Funkie : Home for the Holidays 

 Thank you so much for taking the time to stop by today and big thanks too for always leaving me such lovely comments. 
Both are so very much appreciated.
Have a lovely weekend Everyone
Take care and keep on the happy side
Amanda
xxx
Friday, 2 September 2016

Create inside a Frame - A Vintage Journey- September 2016

HI Everyone and Welcome
How you all doing? Hope you've all had a great week and are all set to hear about our September Challenge over at A Vintage Journey. 
This month, our lovely Julia is the host and her chosen challenge theme is:
'Create Inside a Frame.'
'For this months challenge we would like you to create something inside a frame. Whatever you use show us how you have incorporated a frame in your vintage , shabby, mixed media, art journalling, industrial or steampunk project. We can't wait to see all of your creative frame ideas'
I'm sure you'll agree its a fabulous challenge Julia has chosen and as always there will be a random winner who will receive our Deco Art sponsor prize and 3 pinworthy winners who will be chosen by our Creative guides.

I think I must have had the last three AVJ Challenges in mind when I created my project for Julia's challenge.  I have been creative inside the framed area of a mirror using texture paste and a selection of Tim Holtz layering stencils keeping it all very monochrome! 
The frame was measured and divided into 9 sections.  The sections were cut from mount board , primed with gesso and painted using Black Soot distress paint .
Each panel was then assigned a Tim Holtz layering stencil and worked on individually applying  Ranger Transparent gloss texture paste through the chosen stencil. A lengthy process but then if  a jobs worth doing ..... 
Heres a few of the panels in their glossy state .
Silver gilding wax enhanced the stencilling and gave it a more distressed metallic appearance , whilst still retaining a slight sheen, light dependant. 
After priming and painting the mirror frame with Black Soot Distress paint the panels were positioned and adhered in place.
 The corner trims and horizontal panel dividers are Tim Holtz industrial stickers (Frames and Trims) and the vertical dividers are lengths of the outer frame of Tim Holtz Alpha Parts with  eyelets and ideology fasteners used at the points of intersection. 
Now for some close ups of the Tim Holtz layering stencilled panels beginning with
the Gothic and Lattice layering stencil
the Numeric and Harlequin layering stencil 

 
the Flourish Layering stencil  
the Mesh layering stencil 
and finally the Cargo and Tracks Layering stencil and as a finishing touch -a simple small talk sticker
'Be your Beautiful Self'.
   I hope  I have offered some inspiration with my 'Create in a frame' project . If you haven't already be sure to pop by A Vintage Journey to view some of my fellow Creative Guides  projects - there are some fabulous creations to be seen.
We hope you will be able to join in with the challenge and as Julia says ' We can't wait  to see all your creative frame ideas! '

I would like to enter this into the following challenge: 
That Crafty's- All Square Challenge
(The mirror is square and each of the 4 corner panel's are square)  

 Thank you all for stopping by today.
As always your follows, visits and comments are much appreciated and extremely valued.
Hope you all have a lovely weekend
Take care
and 
keep on the happy side 
Amanda 
xxx